
It is very common to find touchscreen computers in the dashboard of modern vehicles, but if yours doesn’t have one or you just want to find captivating Raspberry Pi DIY projects, keep on reading this article.
Raspberry Pi Carputer Dashboard
Many people tend to complicate the installation of a Raspberry Pi carputer dashboard, however, if you find technology in general or Raspberry Pi somewhat interesting, accomplishing this should be fairly easy for you.
Integrating a Raspberry Pi car dashboard touchscreen (custom car computer) will open up vast possibilities and opportunities for your car. E.g., in Tesla cars, everything is controlled by their carputer software and dashboard, from climate control, maps overview, cabin overheat protection, and more.

With your custom Raspberry Pi carputer (the word "car" + "computer" combined), you’ll be capable of building similar functionality into your car. Some of the cool features your car can get are:
-
Touch screen interface.
-
Fast 4G/LTE internet connectivity.
-
Car diagnostics and integration through OBD-II port.
-
Speaker or audio playback through Bluetooth device.
-
Accelerometer readings.
-
Wi-Fi hotspot.
-
Dashcam for evidence recording and surveillance etc.
What you will need for your custom car computer
You don’t need to know everything about Raspberry Pi or have any special tools and zero car modifications. You will only need to combine a few components, to acquire your custom Raspberry Pi carputer software and dashboard.
Here is all you need:
The goal of this guide
The goal of this step-by-step guide is to show you how a powerful car computer with a touchscreen interface and a lot of functionality, can easily be built into your car.
This guide will not go into details about the actual mounting in your specific car, as it may be slightly different from car to car.
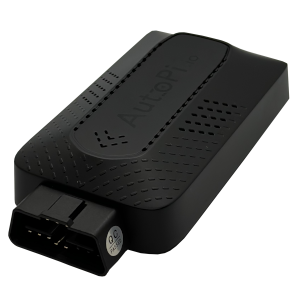
The AutoPi TMU device and AutoPi Cloud give you plenty of out-of-the-box functionality, which makes the job much easier. Here is a fraction of the highlights, which you can use in your DIY project:
-
Power supply, car diagnostics, and telemetry from the OBD-II port.
-
4G/LTE connection, GPS, accelerometer data, and voice speaker.
-
GPS for directions.
-
An advanced dashboard with widgets (will be used in our car computer).
In the following, we’ll add these functionality examples to our dashboard:
-
Gauges to show Speed/RPM/Fuel.
-
Current position on Map.
-
Buttons to control AC temperature.
-
Buttons to control radio volume.
-
Cabin overheat protection.
What is a Raspberry Pi custom car computer?
Raspberry Pi custom car computer (carputer) is a "computer" installed within the vehicle and is based on the Raspberry Pi board. Its purpose is to provide you with several cool features you wouldn't normally have within the vehicle.
Installing your own custom Raspberry Pi carputer will undoubtedly improve your driving experience.

The Step-By-Step Guide
-
Firstly, you’ll need to set up your AutoPi TMU device. You can find the instructions here.
Secondly, assemble the Raspberry Pi 7" Touchscreen Display and connect the Raspberry Pi with the included adapter board.
Finally, assemble everything in the SmartiPi Touch 2 case.
-
In your car, find a spot where you want the touch screen to be positioned. In our example we have mounted the touch screen on the center console, using strong double-sided tape.
Additional tip: The screen could also be located on the steering column and be used as a replacement or addition to the standard instrument gauges.
-
Locate the OBD-II port of your car. Typically, you’ll find it under the dashboard, however, it varies from car model to car model.
Insert the OBD extension cable into the OBD-II port and then connect it to the adapter board located on the back of the touch screen.
Install the SmartiPi Touch 2 case. The back for the cover for SmartiPi Touch 2 allows you to cover HAT boards or other additional electronics on the back of the SmartiPi Touch 2.
-
Once connected the unit powers up and you’ll briefly see a small start-up prompt on the screen. This is because the AutoPi IoT platform is optimized for fast boot and does not contain a graphical user interface.
Don’t worry, this is changeable.
-
This step is kind of the more difficult one and will challenge your technical skills. But don’t lose faith. Follow this guide and by the end, you should end up with a Kiosk mode RPi3 with touch screen enabled, that is using my.autoPi.io UI.
-
If your AutoPi TMU device is online, the installation will be executed immediately, and you can follow the progress on the screen.
If it is offline (or in sleep mode), the installation will be queued and installed the next time the AutoPi TMU device wakes up.
-
After the installation, you’ll see the my.autopi.io system login screen. You’ll need to log in the first time you use the system.

Ready to go
That’s it, you have now installed a custom touch screen computer to your car. What you can do now, is configure which widgets you want to be displayed on your Raspberry pi car dashboard.
We have created the AutoPi dashboard, to be easy to use and fully customizable, meaning you can configure it to be however you want. In addition, you have the opportunity to choose among many useful features (add-ons).
It depends on your preferences. Go to AutoPi add-ons (in the management cloud) and choose whatever you like that will help to improve your driving experience.
If you have any questions or are interested in getting a device, don’t hesitate to contact us or visit our website.
Explore the World of Telematics and Take Control.
Are You Ready to Transform Your Drive?

