
Need a simple, practical intro to DVIR?
DVIR stands for Driver Vehicle Inspection Report.
It is used to document that a commercial vehicle has been inspected before or after operation.
The point is not only to fill out a form.
The point is to make sure that defects are found, reported, repaired and verified before the vehicle is used again.
In commercial trucking, buses and other fleet operations, a good DVIR process helps prevent small issues from becoming safety problems, roadside delays or expensive downtime.
This article explains what a DVIR is, how pre-trip and post-trip inspections fit together, what must be checked, how defects should be documented and how long DVIR records should be kept.
It also explains how electronic DVIR, also called eDVIR, can make the process easier by connecting inspection records with photos, location, maintenance notes and vehicle data.
What is DVIR?
A Driver Vehicle Inspection Report is the driver’s documented confirmation that the vehicle has been inspected and is safe to operate.
Under FMCSA rules, drivers must inspect commercial motor vehicles and record defects that can affect safety.
If a safety-critical defect is found, the vehicle should not be dispatched until the defect is handled.
The repair must be documented, and the next driver must confirm that the issue was corrected or that repair was not needed for safe operation.
This makes DVIR a closed-loop process.
The driver checks the vehicle, defects are recorded, maintenance responds, and the vehicle is only released when the issue is verified.
This is what keeps the process useful.
A DVIR should not just say “checked”.
It should give enough detail that maintenance can act on the report.
This includes vehicle ID, odometer, time, location, driver, component checked, defect description and repair status.

A good DVIR process is specific and fast.
Drivers should submit the report when the inspection is done, attach photos when they help explain the issue and route defects to the carrier or workshop without delay.
For serious defects, the policy should be clear.
Ground the vehicle, record why, repair the issue and release the vehicle only after the repair is documented.
The Crucial Role of DVIRs
DVIRs are important because they connect safety checks with maintenance action.
A consistent process helps identify defects early and prevents unsafe vehicles from going into service.
It also creates a maintenance history for each vehicle and trailer.
This is useful during audits, inspections, warranty cases and internal reviews.
The record should show who inspected the vehicle, what was found, what was repaired and who verified the correction.
When this information is easy to find, roadside checks and internal compliance reviews become much simpler.
How does a typical DVIR inspection look like?
A practical DVIR routine starts before the vehicle is used.
The driver reviews the previous DVIR for the assigned vehicle and trailer.
If defects were reported earlier, the driver checks whether they were repaired or marked as not affecting safe operation.
Then the driver performs the pre-trip inspection.
After the trip, the driver performs the post-trip inspection and records any new defects.
If a defect affects safe operation, the driver should notify the carrier so maintenance can open a work order and document the repair.
| Step in DVIR process | Vehicle component | Action required | Responsible party |
|---|---|---|---|
| Pre-trip inspection | Brakes | Check wear, adjustment, leaks and warning systems. | Driver |
| Pre-trip inspection | Steering | Check steering play, response, alignment and fluid leaks. | Driver |
| Pre-trip inspection | Lighting | Confirm headlamps, brake lights, turn signals and marker lights. | Driver |
| Post-trip inspection | Brakes | Recheck for heat cracks, leaks or changed pedal feel. | Driver |
| Post-trip inspection | Steering | Confirm no new noise, pull or vibration. | Driver |
| Post-trip inspection | Lighting | Check that all lights still work after the trip. | Driver |
| Defect identification | Any critical component | Record defect with notes, photos, odometer and location where useful. | Driver |
| Defect reporting | N/A | Notify carrier or maintenance and open a work order. | Driver |
| Repair action | Defective component | Repair and certify correction, or document that repair is not needed for safe operation. | Carrier / Maintenance |
| Compliance verification | Entire vehicle | Next driver reviews the DVIR and acknowledges the repair status. | Driver and carrier |
Follow the same flow every day the vehicle is used.
This reduces roadside delays, helps maintenance prioritize work and keeps repair certification connected to the original inspection record.
What are DVIR requirements?
DVIR requirements are built around inspection, reporting, repair and retention.
The driver must inspect the vehicle and record any defect that can affect safety.
The carrier must make sure defects are handled correctly before the vehicle is used again.
The record must be kept long enough to support compliance reviews and audits.
Key Requirements

- Daily inspections: Perform and record pre-trip and post-trip checks every day the vehicle is used.
- Items to inspect: Check brakes, steering, tires, lighting, coupling devices, suspension and emergency equipment.
- Record keeping: Complete and sign the DVIR with clear notes, timestamps, odometer and vehicle ID.
- Defect reporting: Report safety-related defects immediately and connect them to a repair action.
- Retention: Keep DVIR records for at least three months after the inspection date.
Are there penalties for non-compliance?
Missing, incomplete or inaccurate DVIRs can lead to fines, vehicles being placed out of service and negative impact on the fleet’s CSA profile.
The best protection is a clean inspection trail.
That means completed inspections, clear defect notes, repair certification and next-driver acknowledgment.
If the record is electronic, it should be easy to search and export when needed.
Electronic Options
DVIRs can be handled on paper or electronically.
Electronic DVIR, or eDVIR, is normally easier to manage because it can include timestamps, signatures, photos, location and vehicle data.
It can also connect inspection results to maintenance systems and work orders.
This makes the process faster for the driver and more useful for the back office.
The advantage of eDVIR is not just that the form is digital.
The advantage is that the defect, the repair and the verification can stay in the same workflow.
Data Loggers: A Partner in Compliance and Safety
Vehicle data can improve the DVIR process by making key details automatic.
A telematics device or data logger can provide odometer, location, vehicle status and health-related signals.
This reduces manual input and helps connect defects with the actual vehicle condition.
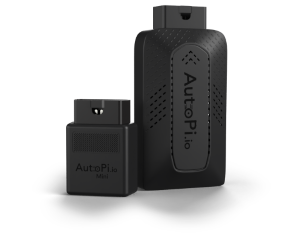
In AutoPi Cloud, drivers and workshops can work from the same record.
Drivers can report issues, maintenance can add repair notes and the fleet can keep the complete history in one place.

How Do I Complete a Driver Vehicle Inspection Report (DVIR)?
Start with a standardized checklist and walk around the vehicle the same way every time.
Check brakes, steering, tires, wheels, lighting, coupling, suspension and emergency equipment.
Record any defect with enough detail that maintenance can understand the issue.
Add photos when they make the problem easier to identify.
Sign and date the report.
If the defect affects safe operation, report it immediately, ground the vehicle where required and create a work order.
The vehicle should not return to service until the repair status has been documented and verified.

When is Completing and Signing a DVIR Required?
A DVIR should be completed during the pre-trip review and again after the trip on every day the vehicle is used.
The driver should also review the previous DVIR before operating the vehicle.
If a previous defect was recorded, the driver must confirm that it was repaired or that repair was not needed for safe operation.
This is what closes the loop between inspection and maintenance.
What is the Purpose of Reviewing the DVIR Book?
Reviewing DVIR history helps confirm the vehicle condition over time.
It also helps the carrier find repeated issues before they become breakdowns.
For example, repeated brake notes, light failures or tire defects on the same unit can show a maintenance pattern.
DVIR history also supports audits, warranty claims and internal safety reviews.
How Long Should DVIRs be Retained on File?
Motor carriers must retain DVIRs for at least three months after the inspection date.
Many fleets keep electronic records longer because they are useful for trend analysis, audits, warranty claims and maintenance planning.
Repair certifications and next-driver acknowledgments should stay connected to the original DVIR.
That makes the record complete and easier to defend during a review.
Do not treat DVIR as paperwork only.
Standardize the process, move to eDVIR where possible and connect inspection reports with work orders so every defect has a clear path from report to verified repair.
Driver Vehicle Inspection Report
Use vehicle data to support safer fleet inspections


