Studies show that on a hot summer day the temperature inside your vehicle will rise dramatically within just 10 minutes after you parked.
The inside of your car becomes an oven roasting your interior. The sun will permanently damage the color of everything it touches, thereby degrading the value of your car.
A number of common advices for protecting your car is:
-
Park in the shade
-
Use windscreen sun protectors
-
Use seat covers
-
Open a window slightly
But what if you could build your own system to help keeping temperatures lower inside your car, like how tesla does it? This is now possible, keep on reading to figure out how.
Build a Car Overheating Protection system like tesla
By creating a system that automatically lowers the windows in your car slightly, when the temperature gets too high, you can vent out the cabin and make sure the temperature inside is not significantly higher than the outside temperature.
This system could automatically ensure that the windows is not opened before a certain temperature is measured, and thereby not letting cold air out of a just parked car.

Since the AutoPi TMU device has the possibility to connect external equipment or sensors, it is possible to connect an USB temperature sensor to it.
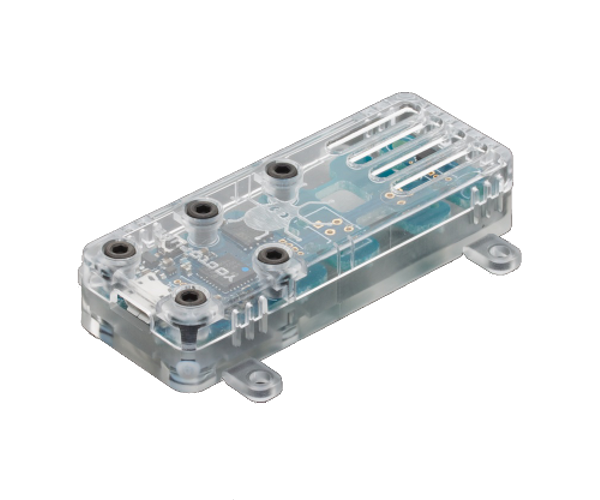
Any sensor will do, but an example is this USB temperature sensors from Yocto. It is very tiny and its location can easily be moved to the best location inside your vehicle.

The temperature sensor is the only external equipment you will need to create your own Cabin Overheating protection system like tesla.
Once the temperature sensor is connected to the AutoPi TMU device, it is easy to install your own software through the module configuration in the AutoPi Dashboard. It is even possible to find existing software modules through the AutoPi Dashboard.

The software modules are configured through your AutoPi Dashboard and when ready they are uploaded and installed automatically to the AutoPi TMU device in your car.
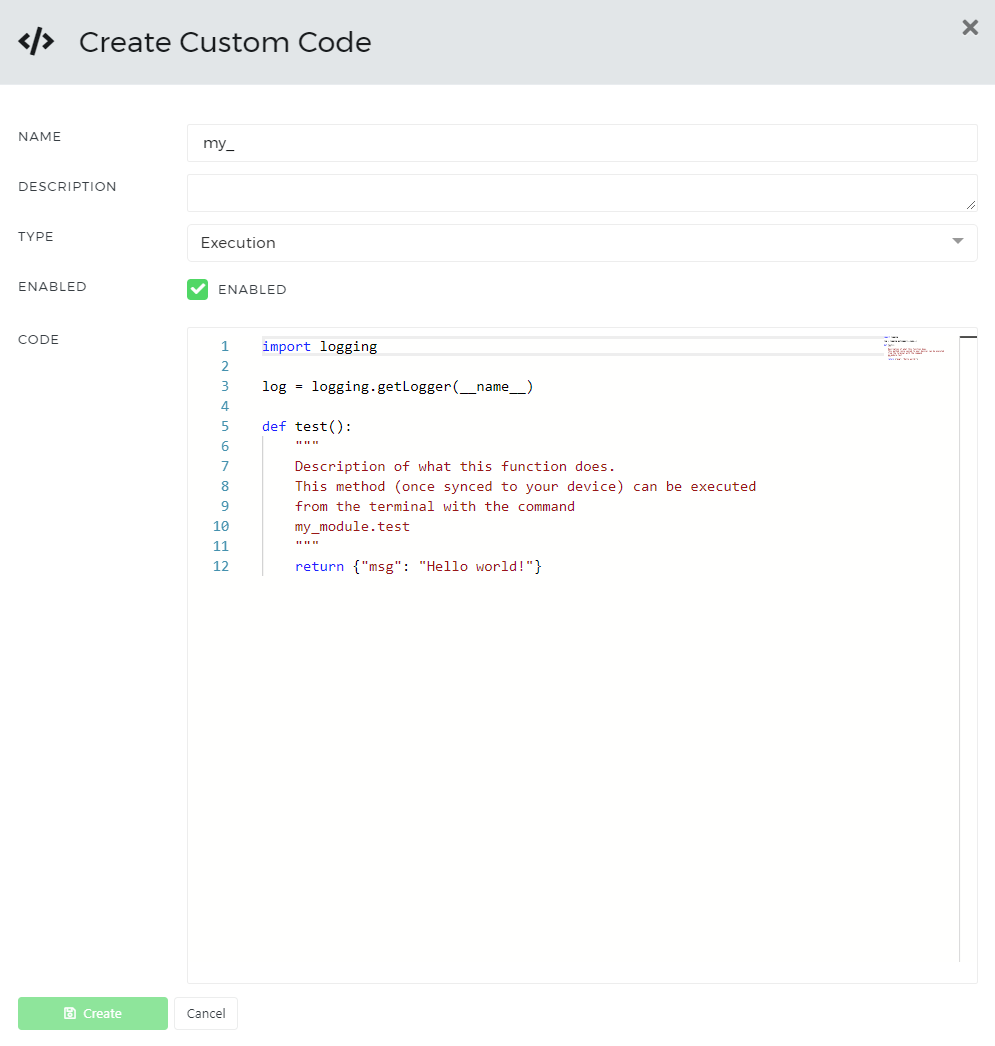
You can even write your own Python code in the built-in IDE (Integrated Development Environment). The IDE will do basic syntax/code checks before uploading.
When ready, you can set up the system to control the cabin temperature, by opening one or more windows a few centimeters. This will allow the very hot air inside the car to be ventilated out and thereby lowering the inside temperature.
You can even setup the system to close your windows again, once the temperature drops to a desired level. Once the system starts ventilating, notifications can be send your phone giving you real-time alerts.
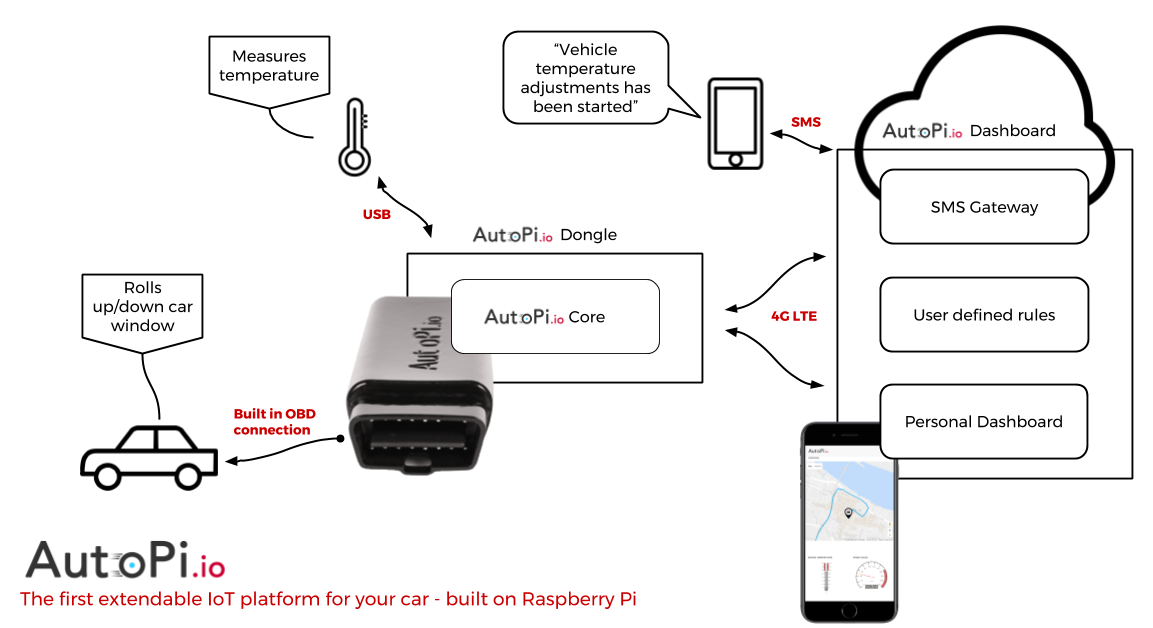
The general idea of the entire system is shown here below. The temperature sensor connects to the AutoPi TMU device through USB. The AutoPi TMU device controls the vehicle through the OBD-II port and sends information to the AutoPi cloud dashboard.
From the AutoPi cloud dashboard, system status information is passed on to the user, either using alerts like SMS or on the personal dashboard available on all devices.

The AutoPi Core is the system running on the AutoPi TMU device. This system ensures communication between all peripheral units and the AutoPi Cloud Dashboard.
The core will collect measurements from the USB thermometer and trigger the OBD connection to the vehicle on the right times, ensuring that the windows are controlled. From the Cloud Dashboard it is possible to setup and configure your system to match your needs.
The flow of the system would be:
-
Temperature is measured using the attached sensor. This is picked up by the AutoPi TMU device.
-
Temperature is checked against rules predefined by the user.
-
If the temperature is too high, the window is lowered slightly to allow colder air to get into the car.
-
A messages is sent to the user of the car, informing about the preventive measures done by the AutoPi system.
-
When the temperature drops inside the car, the window is closed again.
The AutoPi TMU device communicates with the vehicle through the built in OBD port. To control the windows, the AutoPi TMU device uses the CAN bus in the car to communicate with the ECU inside the car. The system will communicate with the temperature sensor using a serial connection.
We hope this gives you an idea of what you can do with your AutoPi system. Is possible to connect a lot of different sensors and subsystems to your AutoPi and use these to build great things for your vehicle.
Interested in the feature? Contact us and we can talk.


