
Need a simple, practical intro to Raspberry Pi and CAN bus?
CAN bus is a communication protocol used in vehicles, machines and industrial systems.
It is used to let ECUs, sensors, controllers and data loggers exchange short and reliable messages over a shared network.
The Raspberry Pi does not have built-in CAN support in the Broadcom SoC.
But it can still be used with CAN bus by adding a USB CAN adapter or an SPI-based CAN HAT.
With Linux and SocketCAN, the Raspberry Pi can then read, transmit and log CAN frames like a normal CAN interface.
This article explains how Raspberry Pi CAN bus integration works, which hardware is normally used, how SocketCAN is configured and how AutoPi makes the same kind of workflow easier for real vehicle and fleet projects.
Raspberry Pi CAN bus integration
Raspberry Pi is a small Linux computer that is widely used for development, education, prototyping and embedded projects.
It has CPU, GPU, RAM, USB, GPIO and storage through an SD card or connected storage.
What it does not have by default is a native CAN controller.
That means CAN support must be added through extra hardware.
The common options are:
- USB CAN adapter: Simple to connect and useful for testing, bench work and quick setups.
- SPI CAN HAT: Mounts on the Raspberry Pi GPIO header and normally uses a CAN controller such as MCP2515 or MCP2518FD.
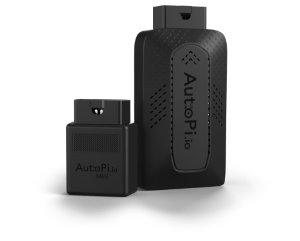
- Integrated telematics device: A device such as AutoPi TMU CM4 includes Raspberry Pi Compute Module hardware together with vehicle-ready power, CAN, LTE and GPS.
On Linux, CAN interfaces are normally handled through SocketCAN.
SocketCAN makes CAN interfaces appear like network interfaces, for example can0.
This means standard Linux tools such as ip, candump and cansend can be used
for testing and logging.
Many Raspberry Pi CAN HATs use Microchip CAN controllers.
MCP2515 is common for classical CAN. MCP2518FD or MCP2517FD are used when CAN FD support is needed.
Common Raspberry Pi CAN expansion boards include:
- 2-channel isolated CAN FD HAT: Useful when CAN FD and electrical isolation are needed.
- MCP2515 CAN module: A low-cost classical CAN option often used for basic experiments.
- PiCAN boards: Common Raspberry Pi CAN HATs used in development and logging projects.
These boards let the Raspberry Pi connect to vehicle and machine networks.
The important part is to match the hardware to the job.
Classical CAN and CAN FD are not the same. A simple MCP2515 board is not enough if the project needs CAN FD.

Raspberry Pi projects with CAN bus HAT integration
A CAN bus HAT adds the missing CAN hardware to the Raspberry Pi.
HAT means Hardware Attached on Top.
It is a board that connects to the Raspberry Pi GPIO header and adds a specific function.
For CAN projects, the HAT normally includes a CAN controller, a CAN transceiver and the connector needed for the bus.
The controller talks to the Raspberry Pi over SPI.
The Linux driver then exposes the CAN interface through SocketCAN.
A practical example is the AutoPi TMU CM4.
It is built on Raspberry Pi Compute Module hardware and uses a Linux-based software stack.
It can expose CAN interfaces such as can0 and use them for vehicle data collection, diagnostics and
telemetry.
Raspberry Pi CAN projects are often used for:
- Automotive projects: Read OBD2, CAN, CAN FD or J1939 data for diagnostics, logging and fleet monitoring.
- Industrial automation: Use CAN or CANopen to communicate with controllers, drives and sensors.
- Education and prototyping: Learn how vehicle and machine networks work with real frames and Linux tools.
- Robotics and IoT: Use CAN for reliable local control and the Raspberry Pi as a gateway to the cloud or local network.
The Raspberry Pi is useful because it gives a flexible Linux environment close to the CAN network.
You can log raw frames, run Python scripts, decode data, forward messages or build a small gateway.
But for vehicle installations, the extra parts matter.
Power supply, ignition handling, LTE, GPS, enclosure, watchdogs and remote management all become important when the setup leaves the test bench.

How to install a CAN bus HAT on Raspberry Pi
Installing CAN bus on a Raspberry Pi is not difficult, but it must be done in the right order.
You need the correct HAT, correct wiring, enabled SPI, the correct kernel overlay and a configured SocketCAN interface.
A typical installation flow looks like this:
- Select the right CAN bus HAT: Choose hardware that supports the required CAN type, such as classical CAN or CAN FD.
- Prepare the Raspberry Pi: Power the Raspberry Pi off before mounting the HAT and check the GPIO alignment.
- Attach the HAT: Align the HAT with the GPIO pins and press it down carefully without bending pins.
- Enable SPI and drivers: Enable the SPI interface and add the correct device tree overlay for the CAN controller.
- Configure SocketCAN: Bring up the CAN interface with the correct bitrate and CAN FD settings where needed.
-
Test the bus: Use
candump,cansendor Python to confirm that messages can be received or transmitted.

Manual step-by-step SocketCAN setup
The commands below show a normal SocketCAN setup for a Raspberry Pi with an MCP2518FD HAT.
The first steps enable SPI and the MCP2518FD overlay.
Then the interface is brought up as can0 with 500 kbit/s nominal bitrate and 2 Mbit/s CAN FD data
bitrate.
The exact interrupt pin, oscillator and SPI chip select must match the HAT you are using.
# 1. Enable the SPI bus and MCP2518FD overlay
sudo raspi-config nonint do_spi 0
echo "dtoverlay=mcp2518fd,spi0-0,interrupt=25,oscillator=40000000" | \
  sudo tee -a /boot/config.txt
sudo reboot
# 2. After reboot, load kernel modules and confirm detection
sudo modprobe mcp251xfd
ls /sys/class/net
# 3. Bring up the CAN FD interface at 500 kbit/s nominal, 2 Mbit/s data
sudo ip link set can0 down
sudo ip link set can0 up type can \
     bitrate 500000 dbitrate 2000000 \
     fd on sample-point 0.875
ip -details link show can0
# 4. Capture frames and log to file
candump -L can0 > raw.log &
# drive, test or transmit frames
pkill candump
Parsing CAN frames in Python
Python can be used for quick CAN logging, filtering and testing.
The example below uses python-can with the SocketCAN interface.
import can

bus = can.interface.Bus(channel="can0", bustype="socketcan")

for _ in range(100):
    msg = bus.recv(timeout=1)
    if msg:
        print(
            f"ID:0x{msg.arbitration_id:X} "
            f"DLC:{msg.dlc} "
            f"FD:{msg.is_fd} "
            f"Data:{msg.data.hex()}"
        )
tx = can.Message(
    arbitration_id=0x123,
    data=bytes.fromhex("00 " * 64),
    is_fd=True,
    bitrate_switch=True,
)

bus.send(tx)
Streaming CAN frames to AutoPi Cloud
A Raspberry Pi can also forward selected CAN frames to a backend or cloud platform.
In a production system, batching, retries, buffering and authentication must be handled carefully.
The example below shows the basic idea.
import os
import time
import requests

API_KEY = os.getenv("AUTOPI_API_KEY")
DEVICE_ID = os.getenv("AUTOPI_DEVICE_ID")
UPLOAD_URL = f"https://api.autopi.io/v1/dongle/devices/{DEVICE_ID}/canlog/"

headers = {"Authorization": f"Api-Key {API_KEY}"}

def push_frame(msg):
    payload = {
        "ts": int(msg.timestamp * 1000),
        "arbid": msg.arbitration_id,
        "dlc": msg.dlc,
        "data": msg.data.hex(),
        "fd": msg.is_fd,
    }

    requests.post(UPLOAD_URL, headers=headers, json=payload, timeout=5)

for frame in bus:
    push_frame(frame)
    time.sleep(0.01)
With these snippets, you can bring up a CAN FD interface, capture traffic and start building a simple logging flow.
For real vehicle use, add local buffering, error handling, reconnect logic and a clear data model before relying on the setup in the field.
Benchmark: DIY Pi stack vs. AutoPi TMU CM4
A DIY Raspberry Pi setup can work well for testing and prototyping.
But a vehicle installation has more requirements than reading frames on a bench.
Power handling, boot time, LTE stability, installation time and long-term reliability all matter.
The table below compares a DIY Raspberry Pi 5 setup with an MCP2518FD HAT, USB LTE dongle and separate power regulator against an AutoPi TMU CM4 setup.
| Metric | DIY Pi + HAT | AutoPi TMU CM4 | Delta |
|---|---|---|---|
| Hardware install time | ≈ 50 min | 8 min | -84 % |
| Boot-to-logging delay | 42 s | 18 s | -57 % |
| Max CAN FD throughput (2 Mbps, frames/s) |
9 800 | 11 200 | +14 % |
| LTE upload latency (128-frame batch, ms) |
620 | 390 | -37 % |
| Average power draw (logging, W) |
5.8 | 4.1 | -29 % |
| MTBF (24 h soak, faults) | 1 kernel hang | 0 | watchdog ✓ |
The AutoPi TMU CM4 reduces installation time and removes many of the weak points in a DIY setup.
For development, a DIY Raspberry Pi stack is fine.
For production fleets or long-term vehicle installations, power handling, LTE, watchdogs and enclosure design become more important.
How the AutoPi TMU device simplifies the process
Setting up a Raspberry Pi for automotive CAN logging normally means combining several parts.
You may need a CAN HAT, power regulator, LTE modem, GPS module, enclosure, ignition sensing, safe shutdown logic and remote access.
Each part adds a possible failure point.
The AutoPi TMU device combines the vehicle-specific parts into one device.
It uses Raspberry Pi Compute Module hardware, but adds the surrounding hardware and software needed for vehicle use.
This includes:
- Vehicle power handling: Designed for vehicle supply conditions and safe power management.
- CAN and CAN FD access: Provides vehicle network access without building a full custom HAT stack.
- GNSS and LTE: Adds positioning and connectivity for remote logging and fleet workflows.
- SocketCAN workflow: Supports Linux-based CAN tools and custom software development.
- Remote management: Connects with AutoPi Cloud for monitoring, updates and data access.
This means the development focus can move from wiring and driver setup to the actual application.
For example, decoding CAN payloads, forwarding data, building dashboards or integrating with a customer backend.

With AutoPi TMU, the Raspberry Pi platform becomes part of a complete vehicle data system.
The device can connect to the cloud, log trips, read GPS position, collect vehicle data and support remote diagnostics or automation workflows.
It is useful where the project needs more than a one-off bench test.
It is especially relevant for fleet projects, prototype validation, industrial vehicle monitoring and CAN-based integrations.
AutoPi Cloud with Device Management
Monitor devices, manage configurations and collect vehicle data from one cloud platform.


